Remove Logos or Watermarks from a Video While Screen Recording
How to use LosslessRec's advanced features
By referring to the following meticulously designed guidance plan, you will have the opportunity to fully unlock a series of powerful advanced features of LosslessRec, embarking on a journey filled with surprises and high efficiency, allowing your operational experience to achieve a qualitative leap. You will fully experience the professional service and convenience brought by LosslessRec, helping you to perform high-quality recording operations with ease in various scenarios of work, study, and life, effortlessly meeting your diverse recording needs and adding more excitement and possibilities to your digital life.
First: Click the following button to free download LosslessRec setup file, and > Install
More and more computer users tend to hook their machine with two or more monitors for a boost of efficiency. More than one monitor in a machine also means a larger resolution and better vision of the screen, so multiple monitors receive a warm welcome among gamers. A dual or triple monitor setup from a single computer is far more cost-effective and convenient. However, for those who need to do screen recording on multi-screen computers, it may become a headache on how to record multiple monitors at the same time. In this guide, we will show you a simple method to capture on your multi-monitor computer.
So here's the easy step-by-step guide on How LosslessRec records multiple screens at the same time on a computer:
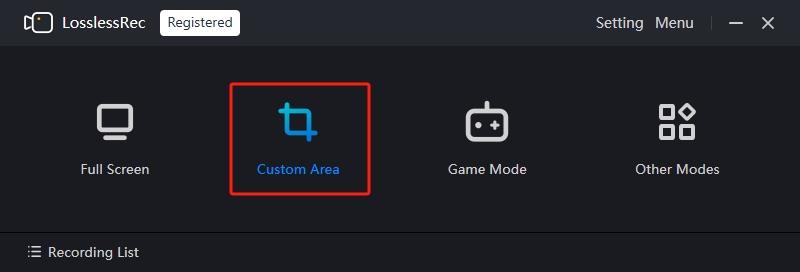
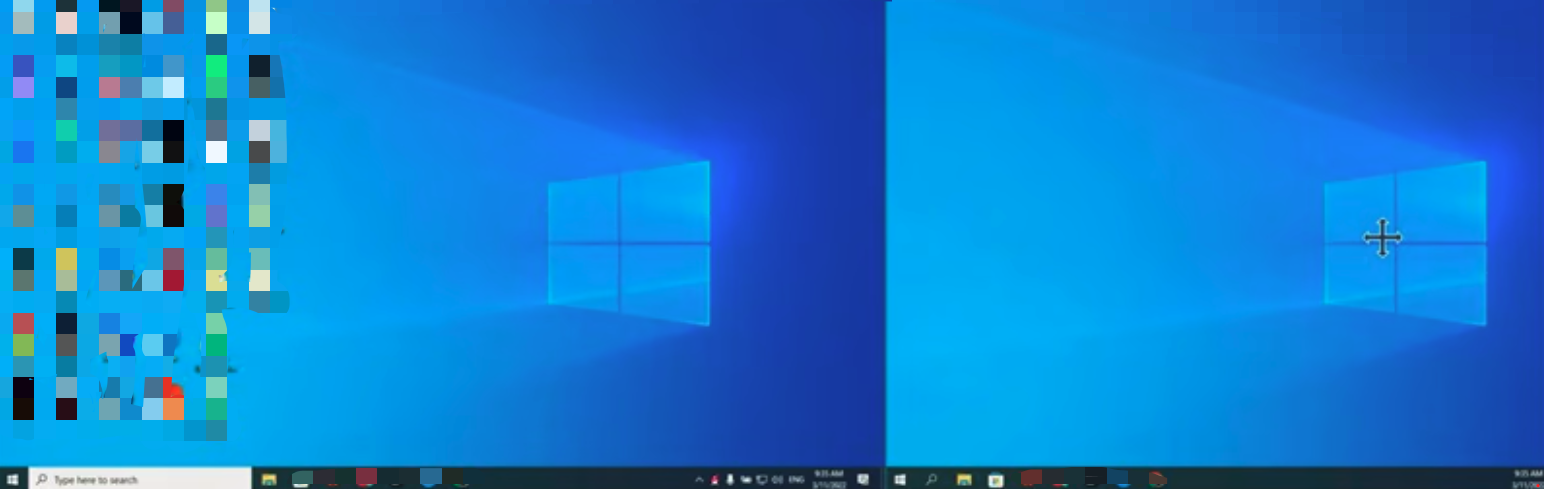
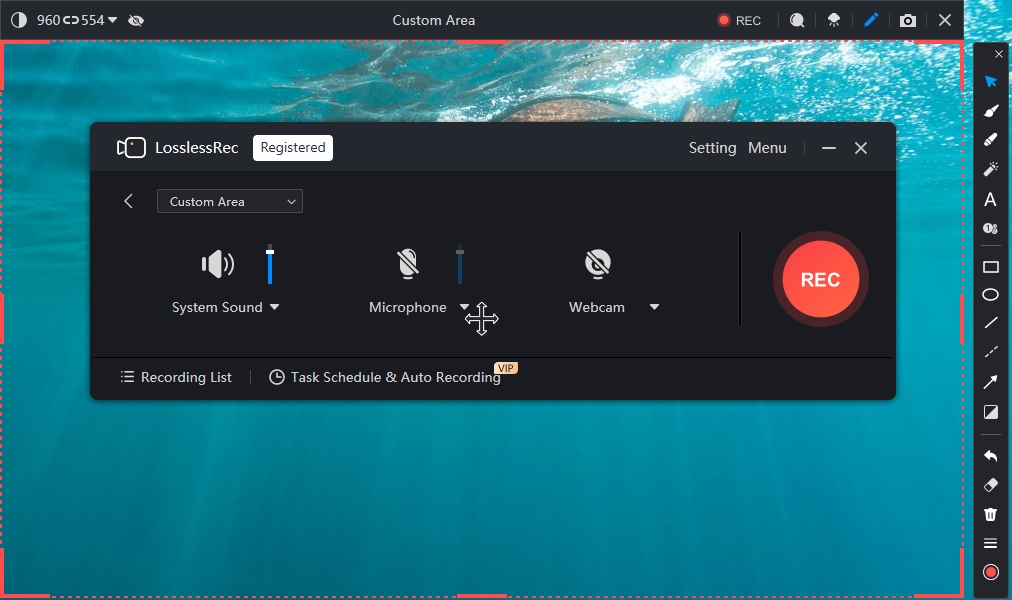
Step 1Open the software and choose Custom Area mode and then draw and drag to create an area to include all monitors.
Step 2Define video settings according to your actual requirements. If you feel difficulty configuring parameters, you can totally keep video settings (e.g format, quality, and frame rate) by default. Mouse cursor effects are available to be adjusted. Besides, a watermark is available to be applied to your videos.
Step 3Press the REC button to start recording, during the process you can add some annotataions to your footage if you care to.
Step 4Tap the red stop button on the floating panel to end the recording (This operation could also be achieved in the main interface). And alternatively, you can use Alt+2 hotkey operations to end the recording too.
Step 5After that, you can preview, rename, edit the recorded multi-screen video or share it to YouTube and Google Drive directly from the Recording List.
Precautions: The multiple monitors must be arranged in the same line, in a square or rectangle shape for a normal and successful screen recording. If not, LosslessRec won't record correctly.
How to Schedule Recording
Surely you know that screen recorders can accurately capture every move on the screen. However, most of the time, you have to manually operate the computer to start recording. Imagine that at work, you are fully focused on handling urgent matters and have no time to spare, but suddenly there is a crucial online training to attend; or you are busy preparing dinner in the kitchen while a very interesting online painting class is being played in your child's room, and you want to record it but can't free your hands to operate the computer. In these scenarios, the traditional recording methods seem powerless.
Don't worry. The scheduled recording function of LosslessRec can just solve these problems! With it, it's like you have an intelligent little assistant. For example, if you know in advance that there will be an online lecture by an industry expert at 10 am tomorrow, you only need to simply set up a schedule in LosslessRec, and it will automatically start recording at that time, completely preserving precious materials. Another example is the weekly fixed-time team online regular meeting. You no longer need to rush to the computer to manually click to record. The software will start on time according to the preset plan, ensuring that you don't miss any important content.
Now, let's follow me to check the detailed steps of scheduling recordings on Windows below and start the convenient recording new experience created by LosslessRec.
Step 1Go to Menu >> Auto Recording >> Schedule
Step 2Click “Create” and jump to its operation interface
As you can see on the Create Schedule window, you can set the task's details.
And here are what you can set on the scheduler.
Define Task names
Set the start and end times
Choose the recording mode
Set whether to record the system and microphone audio
Set whether to repeat the task
Step 3At last, click "Yes" and you get a "task" waiting to be executed
To ensure that the scheduler is launched as expected, please don't close LosslessRec.
And if you hope to record in that background, you can press Alt+d to hide or show the LosslessRec interface.
Precautions
You can configure these options at the settings interface. And it's suggested to output MP4 video at high or original quality or MP3 audio format for better compatibility. And besides, frame rate value doesn't matter too much unless you are going to capture some high-paced moments like games.
You have to pre-running the program or projects and keep the PC's conditions unchanged, or the recording will fail.
LosslessRec cannot carry out two recordings at the same time, so please schedule the tasks one by one.
The task schedule needs LosslessRec running in the background. Make sure it loads at Windows's booting up.
How to Make Annotation for Recording
Annotation tools serve as a brilliant approach to highlighting content.
LosslessRec offers users rich annotation tools including Brush, Eraser, Text, Rectangle, Circle, Inclined Line, and Arrow. On the panel, users can adjust the thickness of the pen and also, change the color of Text and brushes.
Let's have a clearer look at what are the annotation tools and the steps to add them.
Step 1Open LosslessRec and choose a mode
There are two modes available for the feature of annotating. They are Full-Screen Mode and Custom-Area Mode.
Step 2Enable the annotation bar
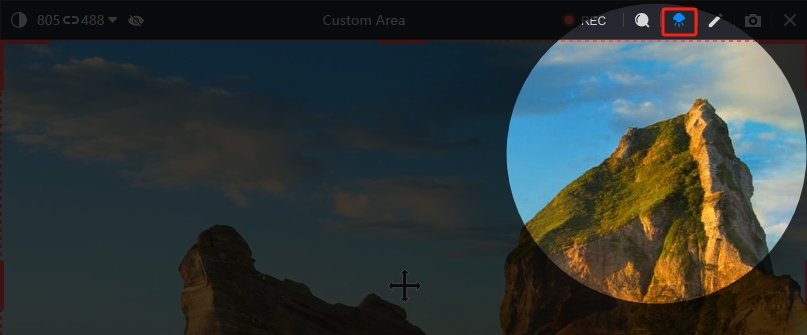
After choosing a mode, a toolbar will show up on the top-center of the screen. On the toolbar, you can click the Paintbrush button to enable the annotation bar. If you hope to enable the annotation bar during the recording, or you can't find the toolbar, you can enable it with Alt+h.
Step 3Start recording and annotating
Pressing the “REC” button or Alt+1, you will start recording.
Then, Annotate with the Paintbrush tools
The usage of the tools on the annotation bar:
Choose: If you used the other annotation tools and hoped to control or modify the current document or screen again, you can press Choose to switch. In this way, you can edit documents keeping the annotations on the screen.
Brush: Draw random lines on the screen. You can change the thickness and color as you like.
Highlight: Highlight sentences or parts on your screen. The color and thickness can be changed.
Laser pen: The laser pointer turns the mouse into a highlighted laser red dot for a clearer and more definite mouse position
Text: Add text the font size and font color you like on the screen.
Number: Add numbers on the screen to make things in order. The size and color are changeable.
Rectangle: Draw a rectangle on the screen. The color and thickness can be changed.
Circle: Draw a circle on the screen. The color and thickness can be changed.
Line: Draw a line on the screen. The color and thickness can be changed.
Dotted Line: Draw a Dotted line on the screen. The color and thickness can be changed.
Arrow: Draw an arrow on the screen. The color and thickness can be changed.
Whiteboard: You can turn the recording area into a whiteboard and write and draw on it.
Revert: Revert to the last operation.
Eraser: Erase the annotations on the screen.
Clear: Clear the all annotations on the screen.
Thickness: Change the thickness or font size of the signs.
Color: Change the color of the signs.
Other tools for annotating during the recording
Other than the annotation tools, you can use other tools to make your recording more informative and unique.
Magnifier (Alt+p): Enlarge the section your cursor is pointing to.
Spotlight: During recording, the cursor achieves a spotlight effect, and moves with the mouse.
Screen Capture: You can take a screenshot during the recording process, and save the picture in png format in the default path.
Step 4Stop annotation and recording
If you hope to disable the annotation during the recording, you can press the “x” button on the annotation bar, the Paintbrush button on the LosslessRec toolbar, or Alt+h on your keyboard.
To stop the recording, you can either press the stop button on the LosslessRec interface or Alt+2. Then, the annotated video will show on the recording list.
Ideal Occasions for Annotations
Annotate Online courses for accurate learning
Annotate Presentation videos to emphasize the contents
Annotate normal videos to make them look colorful
Annotate tutorial videos to better guide their viewers, etc
How to Run LosslessRec Automatically at Computer Startup
In this article, we will show you ways to automatically run LosslessRec when your computer boots up. With this feature, you can make better use of the auto-recording feature and have LosslessRec start automatically once your computer boots up. Now let's check the details!
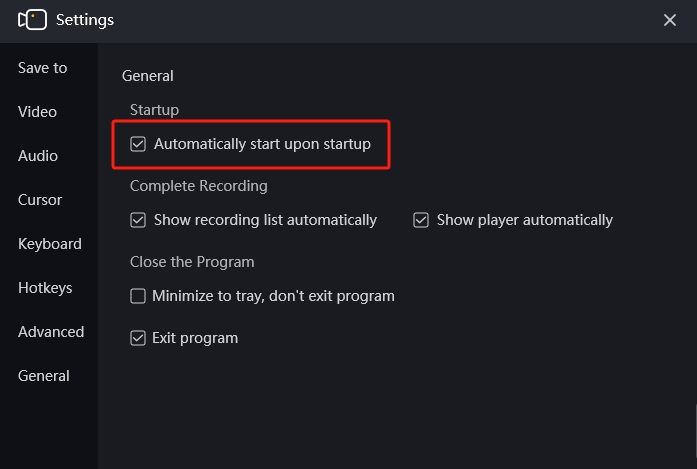
Step 1Please go to Settings
Step 2Then you need to check General menu and click "Automatically start upon starup"
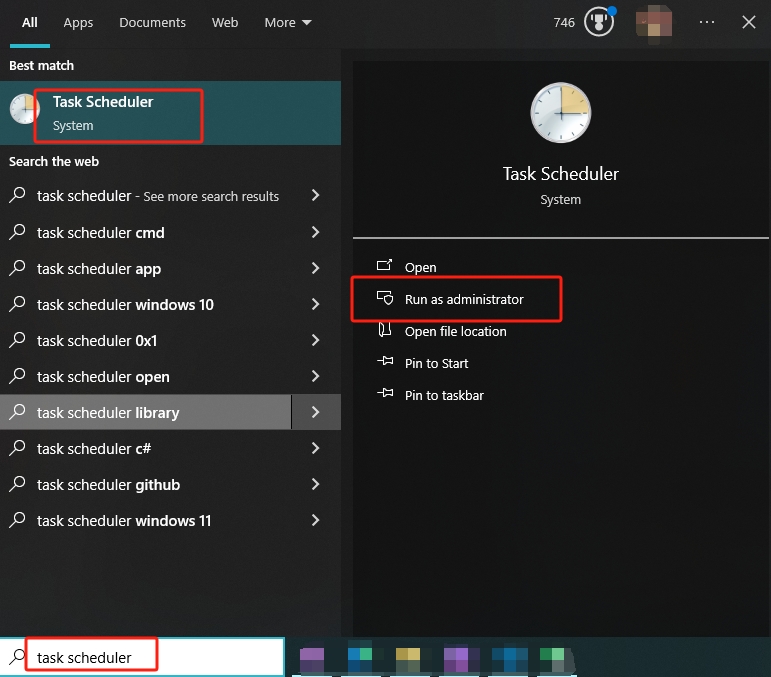
Step 3Confirm that the System allows LosslessRec to run automatically, search "Task Scheduler" in Windows search and run it as administrator..
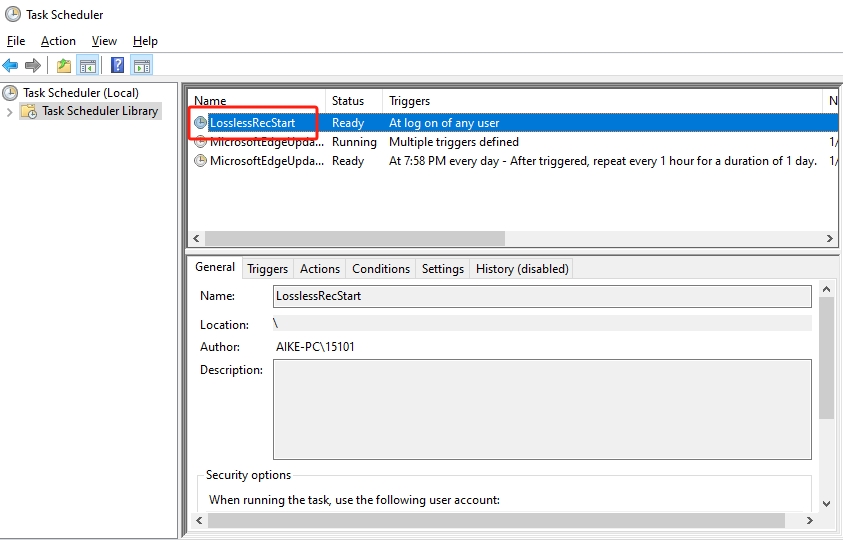
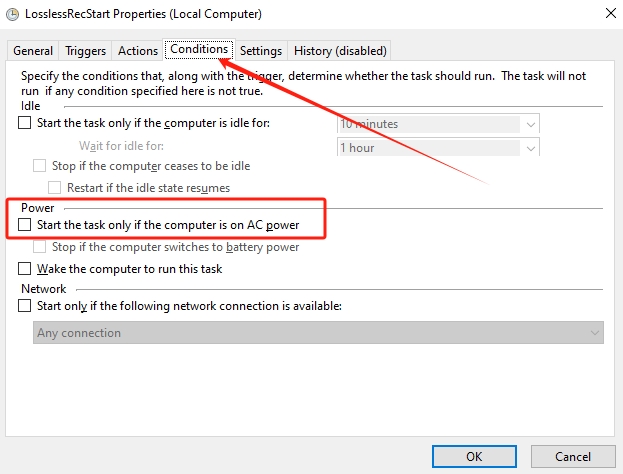
Step 4Go to Task Scheduler Library, find LosslessRec, right-click on LosslessRec, and choose "Properties".
Step 5uncheck the "Start the task only if the computer is on AC power" and confirm.
Restart your computer to confirm whether LosslessRec can start at the computer startup.
At last, if you can’t find LosslessRec after the system start and everything is loaded, you can press Alt+d to force show the LosslessRec interface. However, if it still does not show, you can go to the task manager to check whether it’s running. And if it’s not running in the task manager, you may fail to run LosslessRec automatically at computer startup. Please feel free to contact us for help.
Two Ways to Remove Logos or Watermarks from a Video While Screen Recording
Logos or watermarks can hinder the overall quality and appeal of video content. Removing them becomes essential, especially in professional presentations, content creation, or when sharing personal videos.
Method 1: Edit the video to remove the logo or watermark after recording the screen
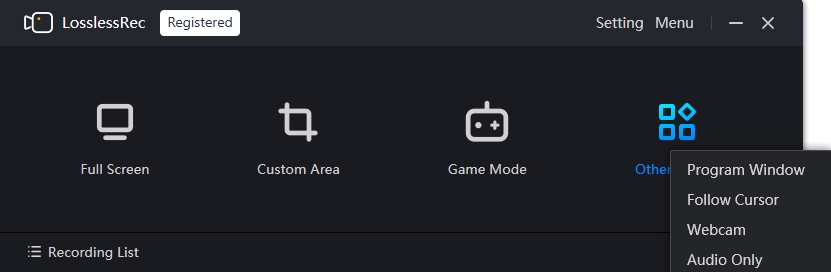
Step 1Set up LosslessRec for screen recording and make sure the settings are optimal. There are 7 recording modes to choose from. You can choose Full Screen mode to record your entire screen. Or, if you want to record a video from a video sharing site like YouTube, you can choose a custom area.
Step 2Launch videos that contain unwanted logos or watermarks, such as YouTube online videos.
Step 3Drag to select the recording area, initiate LosslessRec's screen recording, and play the video segment with the logo.
Step 4Finish recording the desired segment by pressing the stop button or Alt+2. The recorded files will be listed on the recording list automatically.
Step 5On the recording list, you can press the scissors button to enable the Editor where you can remove the logo or watermark.
On the Editor, press the Delogo icon and drag the delogo area to the logo or watermark section. You can drag the edge to enlarge or shrink it to fit the size.
Pressing "Export", you can export the edited video. Then, you can play or locate the delogoed video.
Method 2: Overlapping Technique to Remove Logos or Watermarks
You can use the Watermark feature to set an image to overlap with the logo or watermark.
Step 1Go to Settings >> Advanced >> Watermark and enable Image Watermark.
Press on the Preview button and drag the image to the section of the logo or watermark and confirm, and Note that the watermark position needs to completely cover the original video watermark.
Step 2Launch the video with the logo or watermark.
Step 3Start Screen Recording with Overlap
Choose Custom Area mode, drag the area to record, and press REC or Alt+1 to start the recording. You will record the video and overlap a section (watermark) to cover the logo or watermark. The watermark cannot be seen during the recording, but you will find it in the recorded video.
Step 4Save the video
Stop the recording by pressing the stop button or Alt+2. The file will be saved to the recording list where you can play, rename, edit, delete, locate, upload, and merge.
Step 5Edit the video if necessary
If you still find the video not perfect, you can also edit to delogo, trim, cut, or add subtitles to the video.